
The following instructions will help you start using the Starlink terminal by adding it to an account where you already have other Starlink terminals.
Please follow all the steps listed above. If you have any questions or find any inaccuracies in the document, please leave a comment right here. We will correct and expand this instruction.
Where to start

Typically, the setup process takes no more than 3 minutes.
Carefully check that you have everything you need before starting setup:
- Backup Internet connection (mobile Internet, wifi)
- Email and password for an existing account
- Sufficient internet limit to debit the payment ($95)
⚠️ Gentle Ukrainization from SpaceX:
Change the interface language to Ukrainian in your mobile phone settings and the Starlink application will also be in Ukrainian.
Step-by-step instructions
- Plug your Starlink into a power outlet. Turn it on.
- Join the wifi network, depending on the settings:
- Adaptis SK
- STARLINK
- STINKY
- Log in to the App and wait for the terminal to connect to the satellites. Sometimes, the first turn-on takes 15 minutes (A little patience – it knocks in space and waits for a response).
- You will see a message stating that you do not have an account:
NO ACTIVE ACCOUNT

- Click on this message.
- In the window that appears, copy the data specified in the following format: “00000000-123ADPTS-B1C2D000”.
- Save the copied data.
- Disconnect from the WiFi network.
- Follow the link https://www.starlink.com/activate
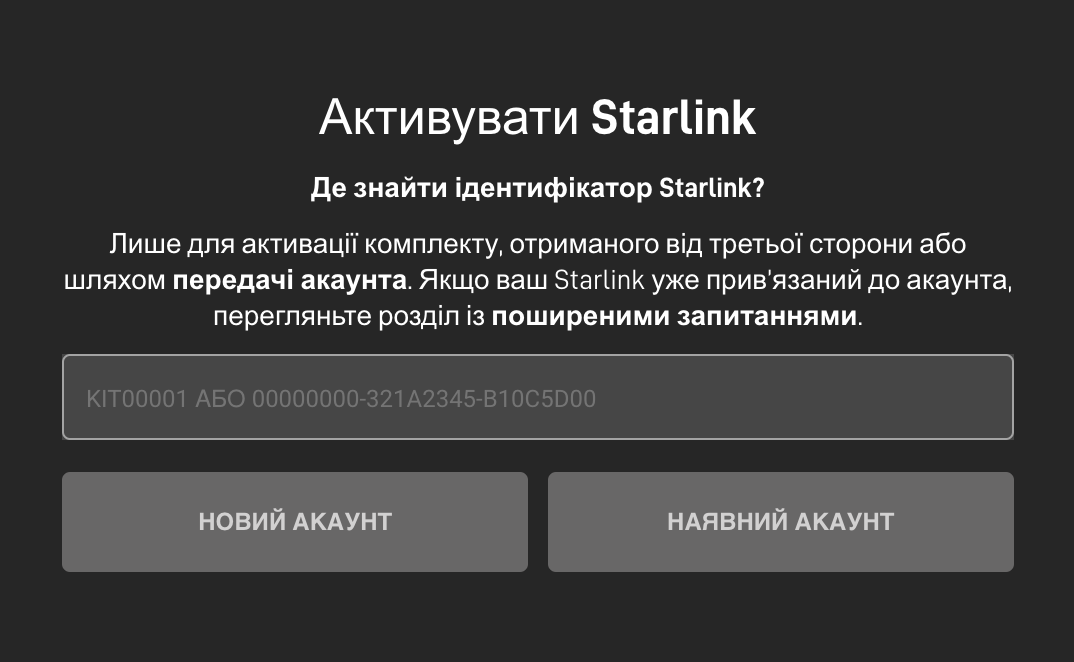
- In the field you see, paste the copied data.
- Click “EXISTING ACCOUNT”
- Log in to your existing account

- In the next step, “Select “Service”, indicate the city of your permanent residence, select the correct option from the drop-down list. Click the “Search” button

For example, Lviv.
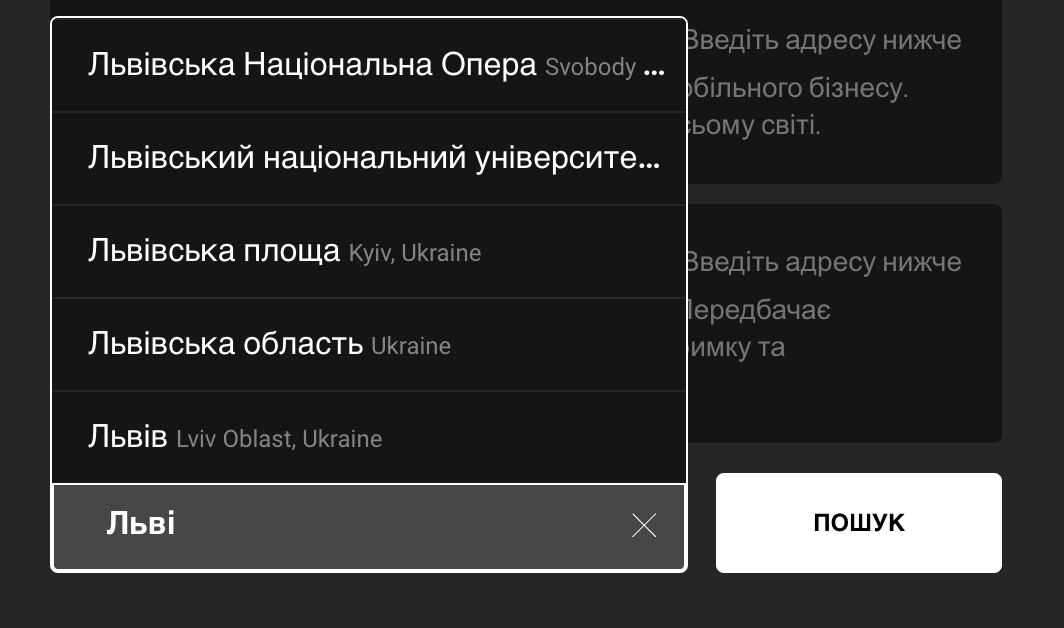
As a result of the search, you will see available Tariff plans for the selected region – Select “Roaming”.
⚠️ “Traveling” tariff.
If you plan to use the equipment in a car, or change its location, then the “Home” / “Residential” tariff will not suit you. Therefore, choose the “Traveling” tariff / “Mobile Regional”.
- Click the “Continue checkout” button
- Pay the amount indicated on the screen.
⚠️ The amount of the charge is less than the tariff. Why is this happening?
Typically, when you add the first Starlink terminal to your account, you will be charged 95 USD (US Dollars), but the second and subsequent terminals will charge a smaller amount.
This happens through system settings to synchronize your monthly internet costs.
That is, if your first Starlink is activated on the 10th, and you connect the second Starlink on the 25th, then the system will perform the write-off not from the 25th to the 24th, but from the 25th to the 9th of the following month.
And next month, on the 10th, he will make a charge for both sets in one payment.
- Turn on your Starlink terminal and wait about 15 minutes.
- If you have done all the steps correctly, the terminal will enter the mode ONLINE !
Congratulations! Enjoy your use.


Leave a comment
This site is protected by hCaptcha and the hCaptcha Privacy Policy and Terms of Service apply.